Make Pouch Actuators from Plastic Bags

Updated: 6 days ago
Difficulty: Easy
Duration: 60 min

Materials
• Clear plastic bag (thick)
• Silicone tube 2mm ID
• Kapton tape or Masking tape
• Double-sided thin silicone tape
• Alcohol wipes
Equipment
• Computer
• Printer
• 3D printer
• Heat sealer
• Scissors
• Permanent Marker
• FlowIO device
Heat Sealing Tips & Practice

1. Heat Sealer Operation
Depending on the brand and model, your heat sealer will have either a knob or buttons that let you control for how long heat is applied. You can only control time, but not temperature.
The heating element is on the bottom side,

and it activates when you push the lever arm down. It deactivates when the set time elapses or when you lift up the lever arm, whichever occurs first.

2. Identifying suitable timing setting
Before working on a project, we must first determine optimal settings for a good seal via experimentation on several test pieces.
Try sealing a 2-layer test piece at the lowest time available. Place your sample onto the machine then push and hold the lever arm down until the light turns off.

Wait a few seconds for cool off, then remove the test piece. If it did not seal, increase the time slightly and repeat this step using a new test piece. Your first goal is to find the minimum time required for achieving the weakest seal. It is important that you first do a very weak seal. Don't aim directly for a perfect seal yet.

3. Check tensile strength of seal-line
Try ripping apart the test piece you sealed. You should be able to separate it.
It is very important that you actually do this imperfect seal, to get a feel / intuition for the force needed break the seal for your specific material at each timing setting.
Increase the timing slightly and repeat this process on a new test piece until you are no longer able to break the seal line.
4. Inspect the seal-line for defects
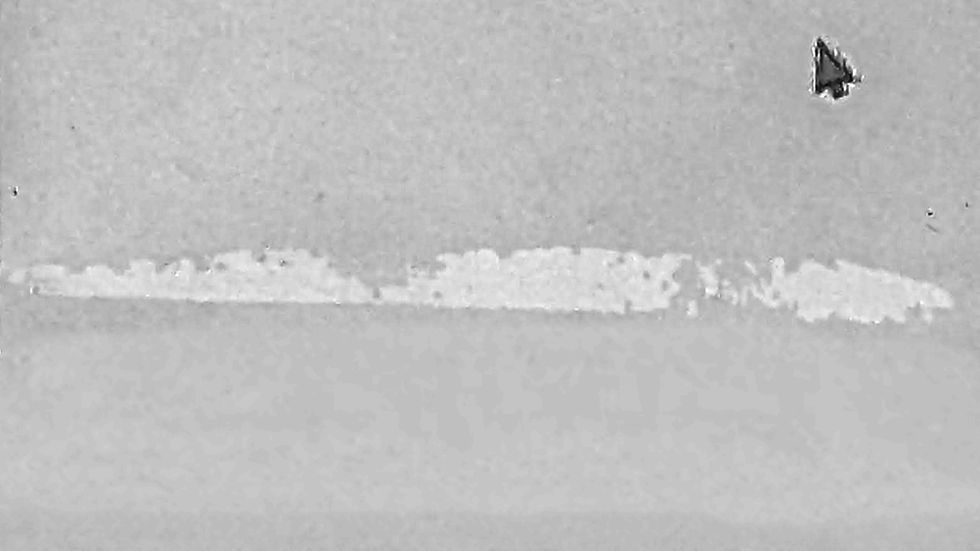
Even a strong seal has defects, which can result in air leaks. Place your test piece about 5cm away form a computer screen with a clear white background and take a photo of it. In post, increase contrast and apply other adjustments to would make the seal line pop so you can see defects clearly.

Increase the timing slightly and repeat this process on a new test piece until you start having a seal line without defects. Remember the timing you use!

5. Using a roller for smoother finish
Achieving a defect-free seal line often introduces the problem of shrinkage, making the surface look uneven and rough. We can mitigate this by using a roller over the work piece while it is still hot, immediately after lifting the lever arm. Do it rapidly at least 10-15 times with moderate downward force.

6. Sealing 3 stacked layers
Try sealing 3 layers. Did you notice that, even with longer time, the upper seal is weaker than the lower? That's because only the bottom of the 3 layers is heated directly.
Visual inspection is almost useless for 3 layers, because you only see the superposition of the two seal lines.

How can you make a 3-layer seal better? You can flip the work piece upside down and seal it again from the opposite side. And if you forgot which side was top and which was bottom during, you can just feel it by touch; the bottom side will feel more course.

7. Sealing N stacked layers
How many layers can you reasonably seal?

8. Leaving air channels unsealed
When making soft actuators, we would want to leave some gaps in the seal-line for air / fluid to flow through.

This can be achieved by masking the air channels regions with tape so that they don't get heated. When applying tape to the workpiece, it is critical that you place it on the side that would be on the BOTTOM during heat sealing, as it would have no effect if the tape is placed on the top.

Alternatively, you can place the tape on the heating element of the heat sealer itself, and then simply position your work piece over the tape as needed.
Careful! Test how many layers of tape you need. Too thin will seal the air channel. But too thick will not give a good seal around it. You must do a test to determine layer count.

9. Determine the offset of your sealer
Draw a straight line over a test piece and try sealing directly over the that straight line. Upon looking at the result, you will be surprised to see that seal line is offset from the line you drew! Carefully note how much that offset is and on which side.

Try this step a few more times until you are consistently able to make the seal line exactly match with your drawn line.
Actuator Fabrication Instructions

1. 3D Print a few Luer Fittings
These fittings serve as the interface between your tube and actuator. They are tiny and must be printed on a resin printer.
(If you only have a basic FDM 3D printer, you can try scaling up the file to make it suitable for printing in your machine.)

2. Print an actuator stencil
Open the stencils PDF below and print it on a regular paper. It includes stencils for several types of actuators.
Based on stencil from OpenSoftMachines

3. Tape the plastic to the stencil
Align your plastic bag so that the sealed sides are directly over one or even two perimeter lines of the stencil shape. This is not required but will save time later.
Tape the plastic over the paper so that it will not move around during tracing.

4. Tape over the air-channels
Put tape over the regions that will serve as air channels to protect them from tracing marks and from the heat later.
Put not just 1 but 2 layers of tape on top of each other.

5. Trace the entire shape
Trace every line of the printed stencil onto the plastic above it, including internal lines.
(Alternatively, you can only put dots at the line endings for a cleaner look.)

6. Seal only the long edge(s) + use roller
Detach the plastic bag from the stencil. Keep only the tape that protects the air-channels and remove all other tape.
Grab your roller so it's in your hand before you start sealing as you will need it the second sealing completes!

Seal the long-edge(s). There would be only one long edge to seal if the other one already is just the sealed end of the bag. Recall your offset test and ensure that you align the piece such that you take the offset into account.

Immediately after sealing finishes, roll the roller over the seal while the material and the bed are still very hot to prevent shrinkage. Roll it rapidly at least 10-15 times with moderate downward force.

7. Cut off excess material on long side only
Cut off the working piece along the outer side of the finished seal only.
(The short edge is still unsealed, so don't cut off the excess plastic on that side yet!)

8. With the tape DOWN, seal internal lines.
Careful! Tape must be facing the heating element (down). Otherwise, you it will have no effect and you will destroy the actuator. Use the roller after each sealing operation.
Careful! Keep the perimeter edge unsealed!

9. Inspect all seal lines
Remove the tape. With alcohol wipes you can also clean the drawn lines. The illuminated white background technique shown previously to inspect the seal lines. If you find any issues, fix them.

10. Prepare your luer fitting for attachment
Clean the base of your luer fitting with isopropyl alcohol and let it dry for a few seconds; don't touch it with your fingers.
Attach a small piece of your special double-sided tape to the base of your luer fitting. Don't touch the sticky side while handling it.

Burnish the taped piece with the handle of your scissors to improve adhesion and make it the seal airtight.
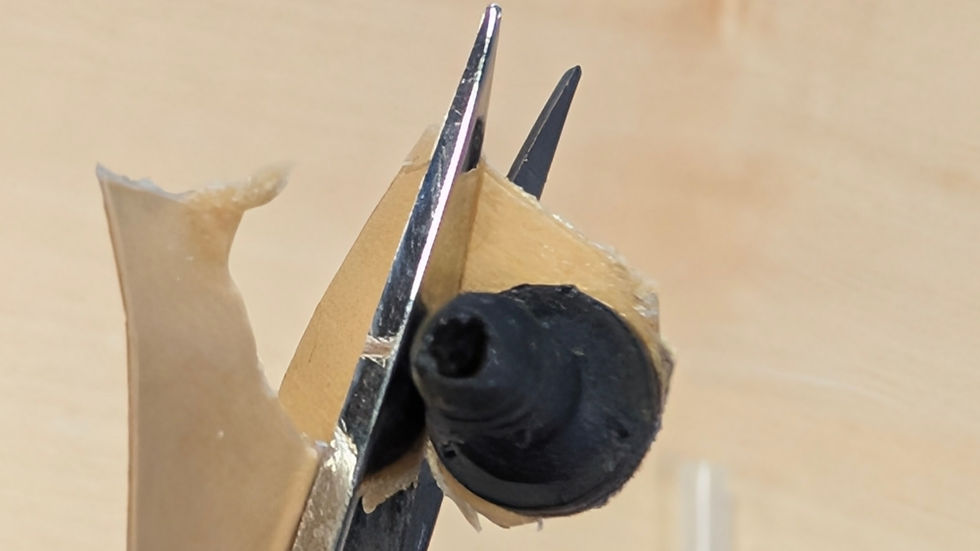
Cut the excess tape around the base, then remove the backing.

11. Attach the Luer fitting near the free edge
Put your approximately 5mm away from the edge of your actuator's open side. Press it firmly and also burnish it slightly with the handle of your scissors to improve adhesion.

12. Create a hole
Flip the end upside down and then poke a hole through the bottom of the fitting using your scissors. Make the hole as wide as possible.

13. Fix the deflation problem
If you seal the remaining edge now, the pouch will inflate. But, when you try vacuuming it, the plastic on the opposite side will get pulled towards the fitting and prevent airflow. We can prevent this problem by putting a small piece of paper tape in-between the two plastic layers.

13. Seal the last edge + use roller
Seal the remaining edge(s) and use the roller again 10-15 times rapidly to ensure smooth finish of the seal line. Use caution so as not to touch the attached fitting with the roller.
Cut off any excess plastic on all sides.
14. Layer separation and inflation
Try inflating the structure. It will most likely not work right away, so use your fingers to separate the layers similar to the process you use when opening a new plastic bag.
This video shows a similar but less-precise process for making pouch actuators with several of the steps above omitted. The main drawback of the process shown in the video is that the tube is not securely connected to the actuator but is leaky.
Variations to try
Alternative Fold structures
• Try a different stencil shape.
• Modify one of the stencils slightly
• Come up with your own stencil pattern.
Alternative Actuation Behavior
Consider a specific type of actuation behavior you'd like to achieve. Can work backwards to determine what type of fold structure you need that would give you the desired outcome?
Alternative Materials
• You can level up from plastic bags by using TPU film instead.
• What other material might you use for this technique?
• How does the material choice influence:
actuation behavior?
travel distance?
force?
Appearance variations
• Create an amination effect by drawing something on the paper, such that the image changes between the folded vs the unfolded state.
• Use an opaque bag to add a layer of mystery around how the actuator works.
2.5D and 3D structures
The actuators you made so far were all planar (2D) in their unactuated state. But you can also consider putting some folds to create non-flat actuators. What can you come up with?
Multiple Layers
• What kind of actuator or actuation behavior can you achieve if you have three layers instead of just two
two folded sheets with different origami pattern next to each other in the bag.
• Layer two or more sheets and then fold them as a unit.
• Layering of very thin sheets of paper allows you to create your DIY cardstock of any thickness you want. Though in that case, you may need to glue / tape them together.
Multi-Chambered Structure
• Make an actuator with two or more independently controlled chambers. Now you can actuator only different regions of the actuators. What is something interesting you can using two sets of chambers.
Make something useful
• Can you make a gripper based on this approach?
• What about a set of pliers?
• What other useful item or a "tool" can you develop out of this approach?
Find its limits
• What is the maximum amount of mass your actuator can lift?
• How many actuation cycles before something breaks?
• What is the lowest operating temperature for this actuator?
Interactive Art
• Dynamic shadow art
• Kinetic art
• Bystable structures
Post-requisite topics & Going beyond
The resources below are meant to allow you to go deeper into this topic, learn about closely related sister topics, or proceed to the next logical topic based on the skills and knowledge obtained from this article.
Comments